Showing posts with label Olive Oil. Show all posts

Monday, October 7, 2013

BzzAgent: Kashi Hummus Crisps in Sea Salt and Olive Oil Review

I love hummus so when BzzAgent offered me this campaign, I immediately thought Red Pepper hummus on a Kashi Hummus crisp........oh my! You bet I signed up immediately because the pita chip was so yesterday.

DSCN3434

When my BzzAgent kit arrived, it contained a bag of the Kashi Sea Salt and Olive Oil crisps plus coupons to hand out. I noticed the Kashi Hummus Crisp family consists of:

  • The Sea Salt & Olive Oil Hummus Crisps

  • Caramelized Onion Crisps

  • Sun Dried Tomato, Feta and Basil Crisps


All flavors can wake up a plain hummus dip to even compliment a traditional sour cream based dip.

First Impressions:
Upon opening the bag, I did notice many of the crisps were broken beyond what I call being able to scoop any dip with. You could dunk the pieces but that is fine for me at home but not something I would want for my guests. I had about 65% of the crisps that were broken and the rest were whole or not injured enough to count as a "ruined" crisp. I did notice the product is light an airy, so that is always nice when watching your weight, as a generous 27 crisps are only 120 calories! That is a snack option number I like and it's enhanced by 3 grams of Protein and 4 grams of Fiber, so not just an airy treat but it does pack some nutrition behind it. The ingredients are friendly too, with some natural and even organic ones like the spices, olive oil to the nonfat dry milk. The sweetness comes from dried cane syrup. So far I like what makes up the crisp.

DSCN3438

The Taste Test:
I munched on a few plain pieces to get an idea for the flavor and the seasonings are not as plain as you would think with a Sea Salt & Olive oil flavor. You almost get basil and herb notes and this may come from the parsley and "spices" listed. I like when I buy plain flavored chips to pretty much be a nice toasty taste but not something that would not hit off with my dip. I paired the crisps with my Hummus in Red Bell Pepper flavor but the parsley/basil like herb taste tended to even stand out over the dip. You can also smell the herbs coming from the bag. Now, I am a "pro-herb" girl but because they are dry, the were a little too much that the olive oil was almost non-existent. I would have been more accepting of the flavor if it said so in the flavor name "Herbs". The texture is also crisp when you break it in your hand but once the crisp gets wet by a dip or even by being in your mouth, the crisp diminishes quickly. Think air popped popcorn when you put it your mouth and it starts to sometimes leave it a bit dry after eating.

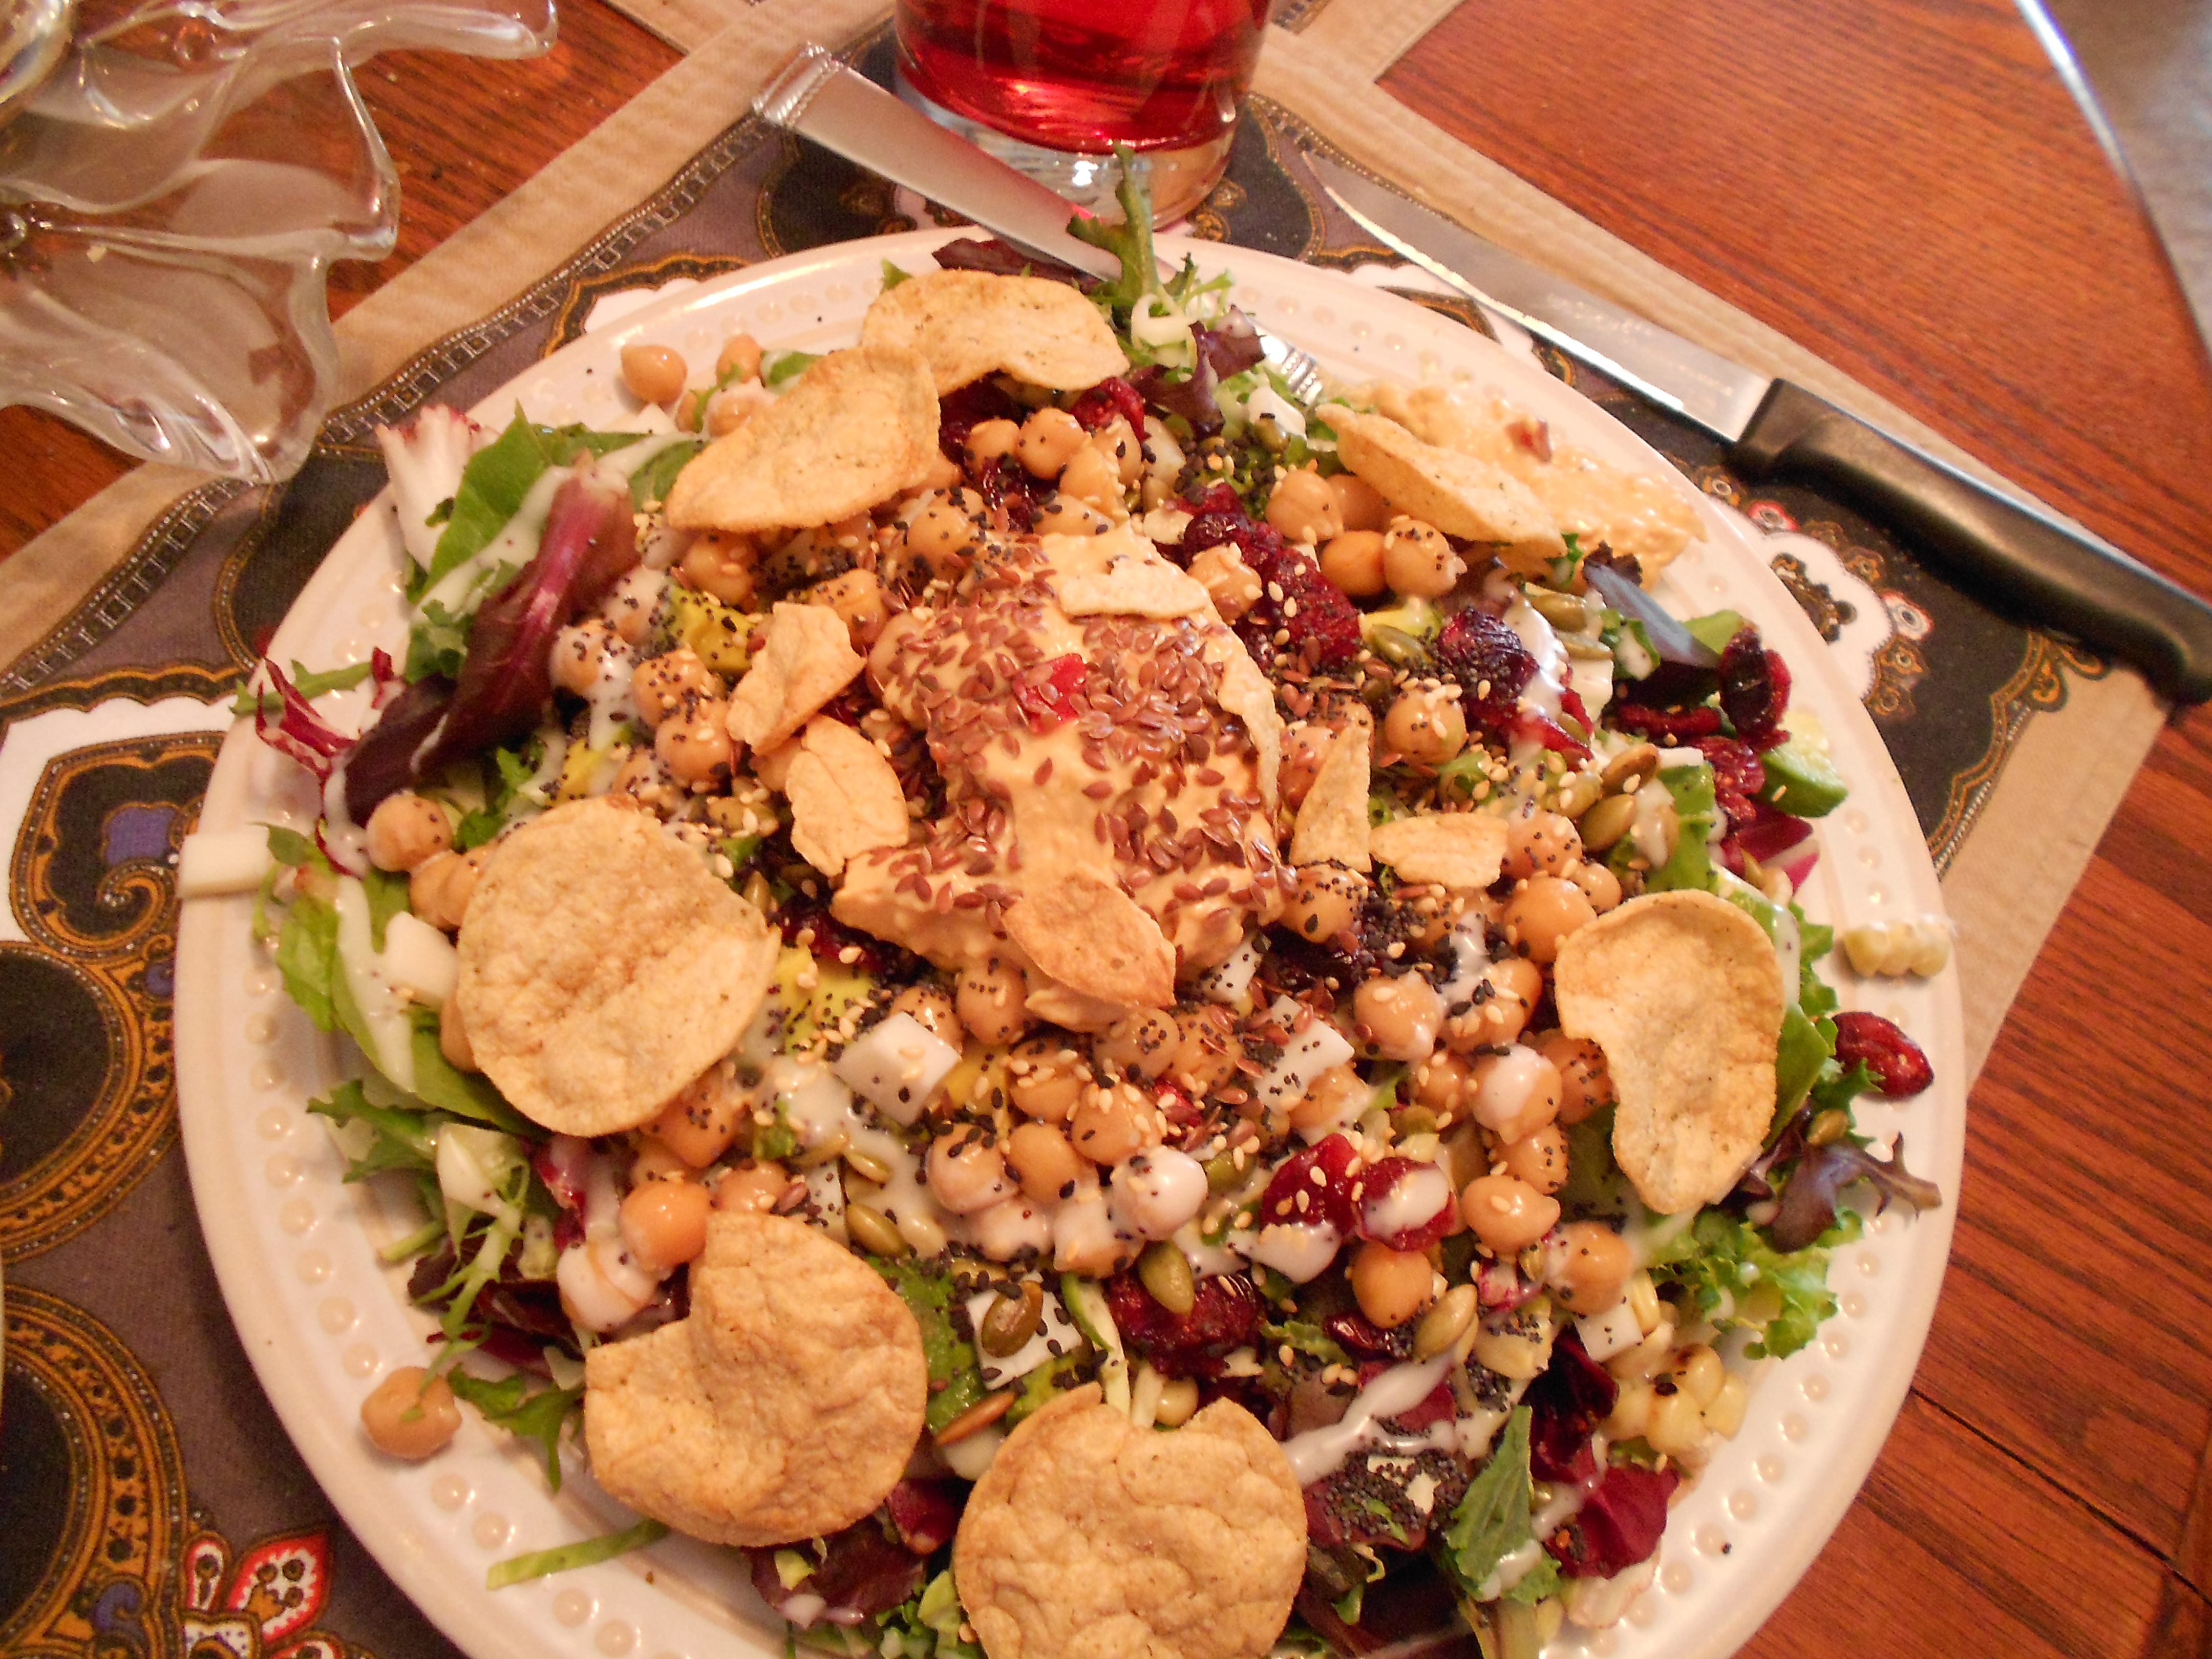
I was craving more crisp so thought why not just pair it up with a salad so I can not lose the crunch and there I did find the chip more pleasing as the seasoning complimented the lettuce blend perfectly.  I also added a dollop of my favorite hummus dip and some seeds (flax, black sesame, toasted sesame, poppy, and pumpkin seeds) to add more of the wanted (crunch) texture.
DSCN3433

I am glad I tried the chips as I would have purchased them (before campaign) anyways but I'm 50/50 on purchasing them because of the texture. I understand the air popped texture is too keep them healthier but it leaves me craving a chip, cracker, anything and actually amplifies the craving (so non-diet). I prefer eating 10 "a little naughty" crisps at the same caloric and fat amount that are delicious versus 27 that are good (and may be the only whole crisp amount in the entire bag). That's it! Kashi Hummus Crisps are good.....not bad, but not spectacularly delicious. For a middle of the road hummus crisp, on sale, plus a coupon........yeah, I'd get them but in another flavor because if you are going with herbs, go all the way and those Sun Dried Tomato and Feta, plus Basil crisps have my name all over it.

DSCN3438

I received the above products from BzzAgent and Kashi, free of charge.  I am not obligated in providing a favorable/positive review, just my honest opinion.  My review is based on my experience with the product(s), which may differ from yours.

Friday, July 5, 2013

BzzAgent: Filippo Berio Extra Virgin Olive Oil Savings


My blog post before had a review about the great dishes you can prepare with Filippo Berio Olive Oils, but now come the savings.

Go to: http://www.filippoberio.com/ and you can familiarize yourself with their product line

Go to: http://www.filippoberio.com/coupons to get your coupon and save

The site has recipes that will inspire you this Summer in creating light dishes that will taste delicious. #GotItFre


Wednesday, April 10, 2013

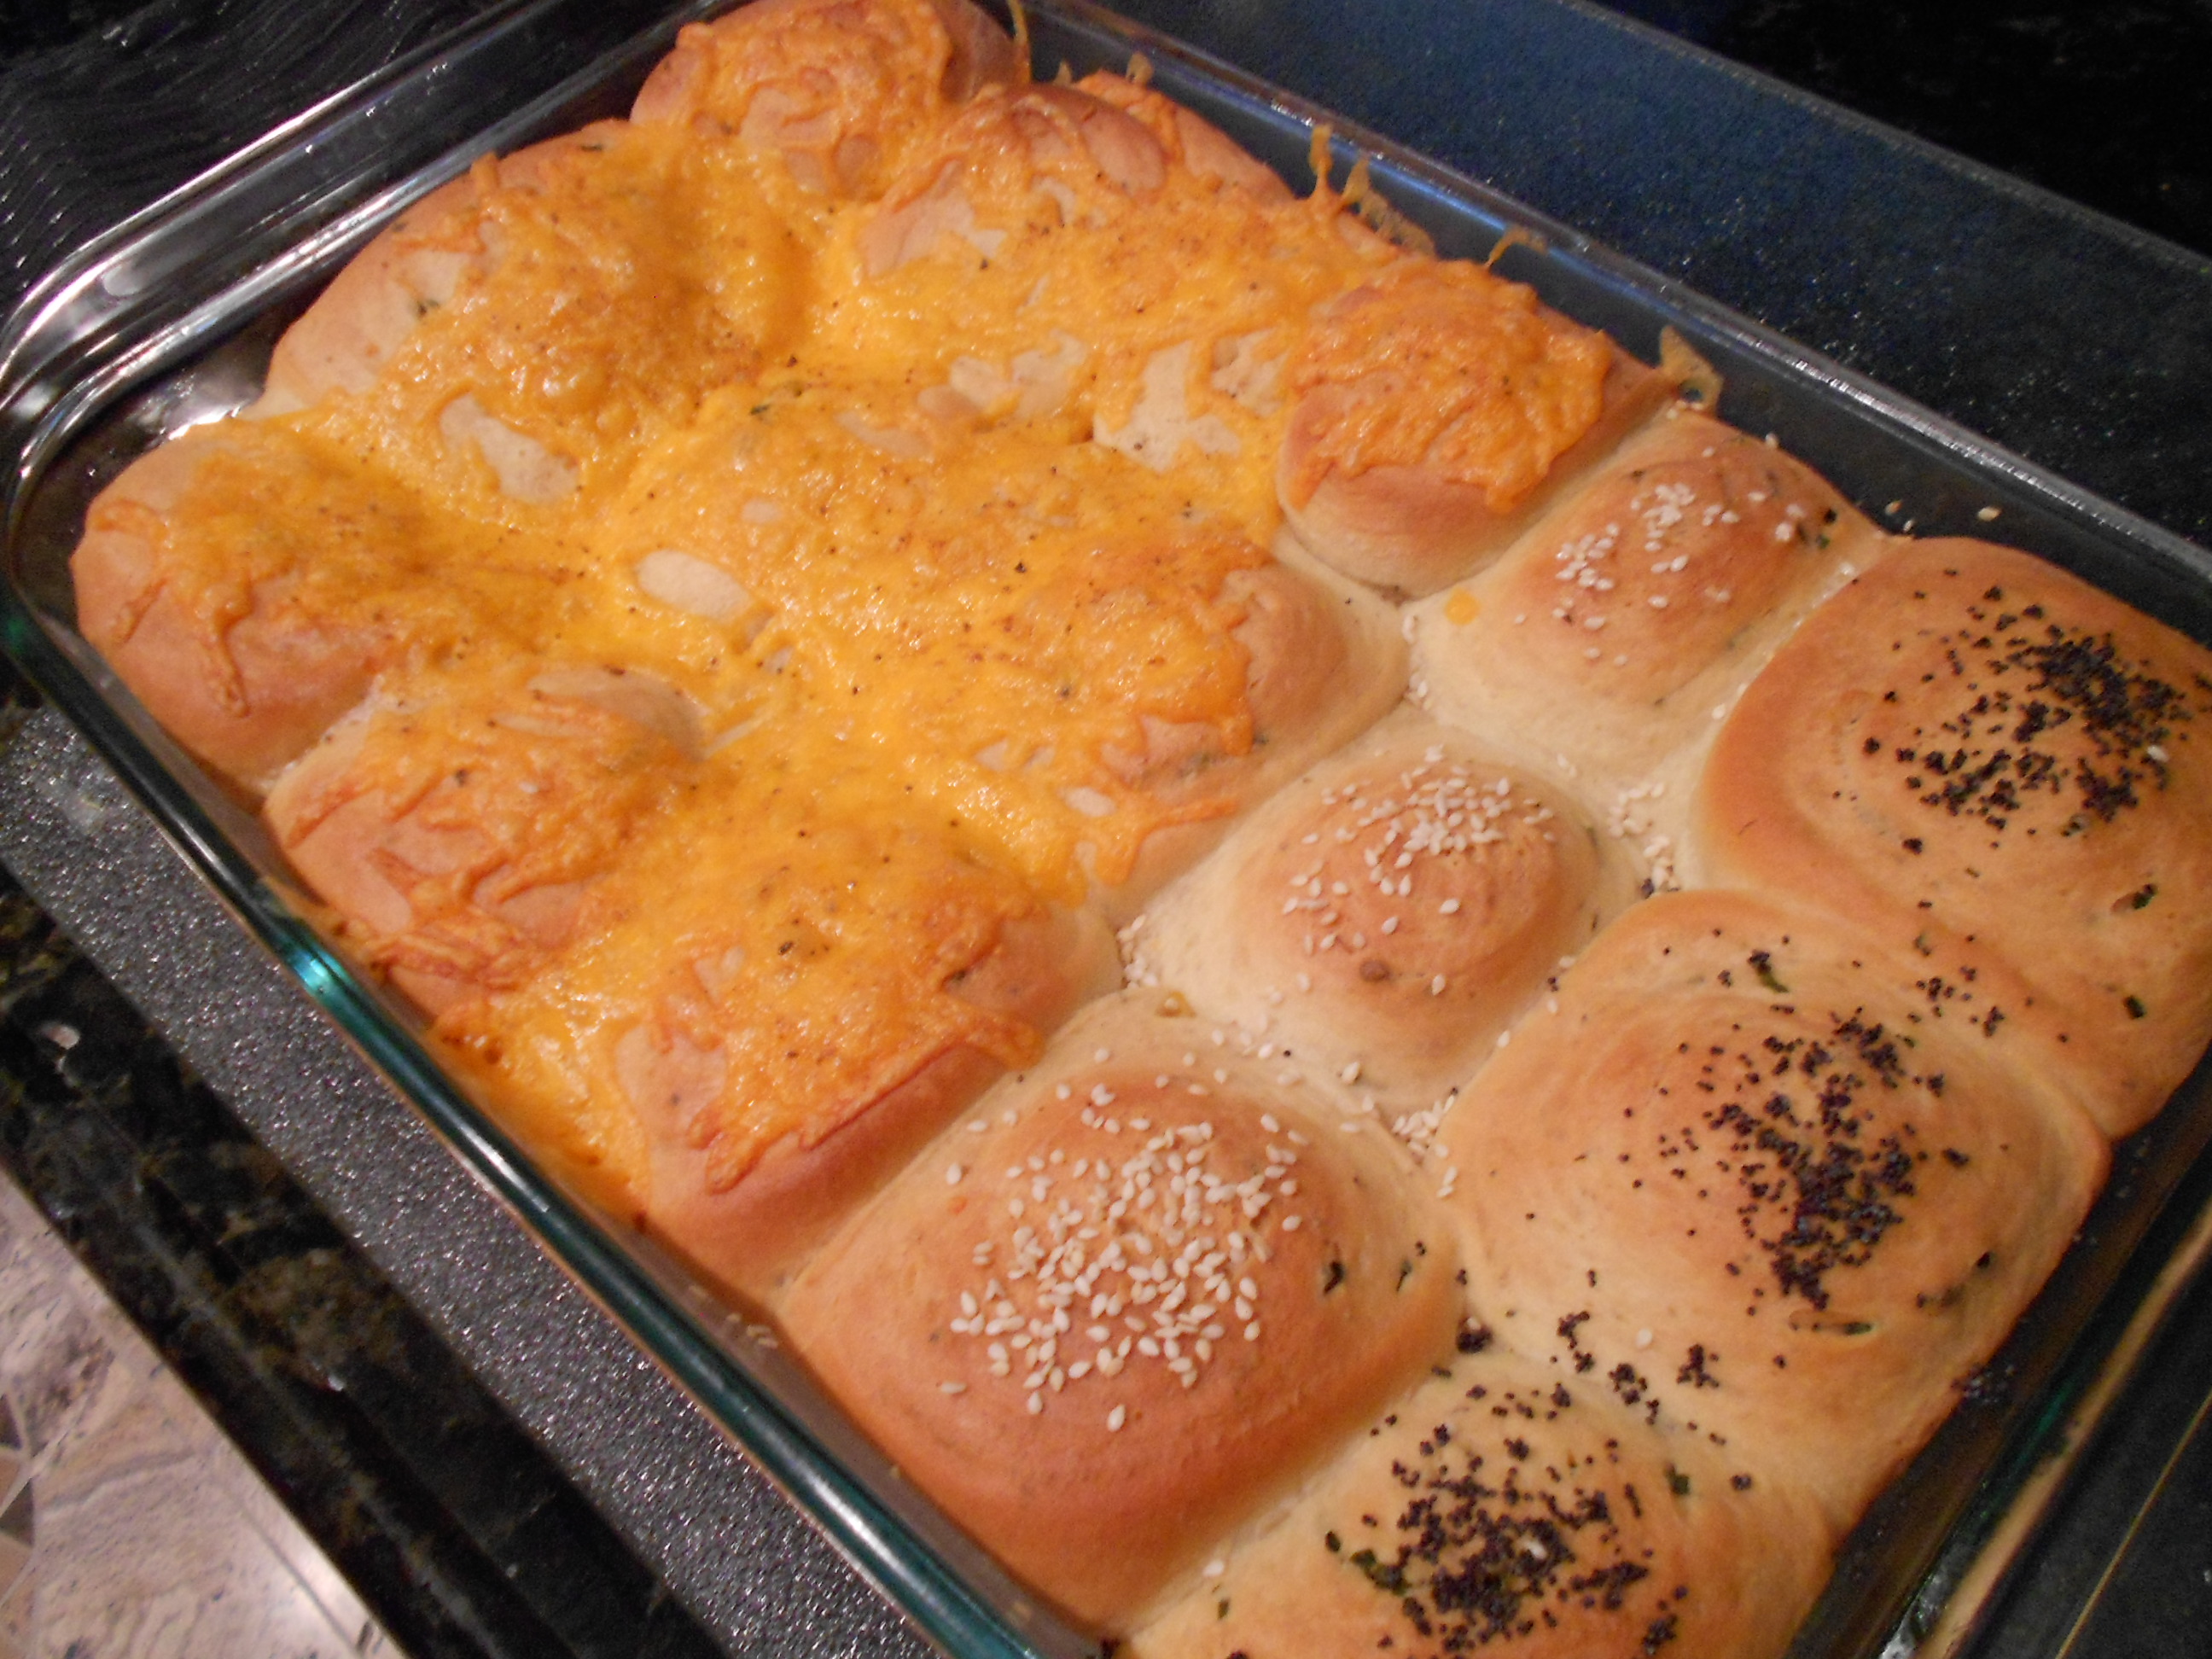
Herbs de Provence & Chives Rolls.... Cheddar Cheese, Poppy Seed, and Sesame Seed Versions

DSCN1788

I wanted to make a new recipe this last Easter when it came to rolls and I had planned to test several recipes out but then the day came, and I needed something fast because I had no back-up plan.  It is difficult to always know what guests like or dislike because some just go with it to be polite.  I wanted a recipe that pleased all and on Easter morning this is what I made.  Who said you can't think on the fly on a holiday?  I was also influenced by a bushy Chive plant I have in a pot, which was getting taller and fuller.  I see it from my kitchen so it was sort of waving at me for attention :)

Rolls:

1 cup of Whole Milk

2 1/2 teaspoons of Active Dry Yeast

2 tablespoons of White Sugar

1 tablespoon of Honey (I used a Orange Blossom variety)

1 Egg at room temperature (whisked)

6 1/2 tablespoon Unsalted Butter (melted), you will use about 1 stick in the end.

3 1/2 cups of All-Purpose Flour

1 1/4 teaspoon of Kosher Salt

1 teaspoon of Herbs de Provence Herbs (dry)


Filling:

1/4 cup or to taste of fresh Chives


Basting:

1/2 teaspoon of Olive Oil

1 teaspoon of Unsalted Butter (soften)


Toppers:

1/2 cup of Cheddar Cheese*

Sesame Seeds

Poppy Seeds


*Don't have seeds or don't like them, just up the cheese amount to 3/4 cup.  You can even mix cheeses if Cheddar is not all you want.

<p>

You begin by heating up the 1 cup of milk until warm.  I tend to need to give my cup a quick 30 seconds in the microwave but I know some take more or less.  I always shoot to aim between 105 to 110 degrees.  I then add the yeast, sugar, and the honey.  I mix the ingredients together with a spoon.  My oven has a "proofing" mode so within 5 minutes at 105 degrees, the yeast is activated and foaming.  You want it to expand and build a good amount of foam, so it may take about 10 minutes if it is cool and on the counter.


DSCN1735


I then empty the cup into my mixer's bowl that has the dough hook attached.  I add the egg and 6 1/2 tablespoons of unsalted melted butter.


DSCN1739


On low, I mix everything until it's incorporated, stopping a few times to scrape the bottom and edges.


DSCN1740


I add the salt and Herbs de Provence to the flour.


DSCN1732


In small increments, I add the flour mix, again stopping to scrape down with a spatula any ingredients that are trying to rebel :).  After I added all the flour, I mix on low for about 2 to 3 minutes.


DSCN1741


I then increase the speed to medium and knead until a soft and smooth dough forms.  This takes about 10 to 12 minutes.


DSCN1743


I transfer the dough to a floured surface and work it flat, to about a 10 to 12 inched square.


DSCN1744


You fold one third of the dough into the center and then the other third (from the top) over.


DSCN1745 DSCN1746 DSCN1747


It's sort of like folding a letter in how you fold the flaps.  Turn the dough and fold again until you are left with a square (small one).  I take some of the butter and butter a large bowl.  I place the dough square in the bowl, cover with plastic wrap, and then proof for 1 hour.  You pretty much want it to double at least in size.


DSCN1748


I take more of the left-over butter and butter a lasagna dish (any baking pan) that is 9 x 13 inches in size.


Once the dough has proofed, I take it out of the bowl and dump it onto a floured surface.


DSCN1753


I roll out the dough to a 15 inch square and sprinkle on the fresh chives.


DSCN1756


Begin to roll tightly from the bottom up to make a log.  Just like you would cinnamon rolls.


DSCN1759


DSCN1764


You then take a floured knife or a dough scraper and start slicing.  I was able to yield 16 buns on my first take, but you will get between 14 to 15 if you measure right.  I always make small ones that I call "taste testers" :) and these are usually the two corners of the log.


DSCN1766


I placed the buns in the buttered lasagna dish and then covered it with plastic wrap, which I lightly rubbed with olive oil in case the wrap wants to stick to my buns when they are proofing.  You can use butter too if you desire.


DSCN1768


Allow the dough to proof for about an hour.  You are aiming for them to like like airy pillows.


DSCN1774


Preheat the oven to 375 degrees.  Remove the plastic wrap and bake for 12 to 15 minutes.


DSCN1783


Remove the buns from the oven and mix the basting ingredients of the olive oil and softened butter.  Baste the buns and then come the toppers.


DSCN1773


I opted for part cheddar cheese, a row of sesame and a row of poppy seeds.  The basting mix allows the seeds to stick but also adds a great flavor to the buns.


DSCN1785


Put the buns back in the oven and bake for 10 to 12 minutes.  If you notice over browning, just cover with foil to prevent any burning.


Take the buns out and I noticed I had left-over baste, so I basted the cheesy ones so they would shine pretty.  Allow to cool a bit in pan and then you start serving.  They pull away from each other whole, so no worries there but you may also use a knife if you wish.  Sometimes the cheese can make them unite but not enough that they can't pull away.


DSCN1789


To store, I waited until they cooled completely and then wrapped them with plastic wrap and stored them in the fridge.  They last great and you just take them out when you want one and allow them to come down to room temperature or give them a warm up in the oven.  They go great with a simple salad to what we had for Easter, lamb with a Pomegranate glaze.


DSCN1794


Next week comes the sweet version I made of these with some tweaks.  I had left over Pomegranate glaze from the lamb that needed to be used plus I was craving pecans with maple, so I made two different sweet versions!


Enjoy!